> ## Documentation Index
> Fetch the complete documentation index at: https://wb-21fd5541-codex-link-agent-evals-docs.mintlify.site/llms.txt
> Use this file to discover all available pages before exploring further.
> Create a W&B Experiment using the Python SDK to track run initialization, hyperparameters, and metric logging.
# Create an experiment
Use the W\&B Python SDK to track machine learning experiments. You can then review the results in an interactive dashboard or export your data to Python for programmatic access with the [W\&B Public API](/models/ref/python/public-api/).
This guide describes how to use W\&B building blocks to create a W\&B Experiment.
## How to create a W\&B Experiment
Create a W\&B Experiment in four steps:
1. [Initialize a W\&B Run](#initialize-a-wb-run)
2. [Capture a dictionary of hyperparameters](#capture-a-dictionary-of-hyperparameters)
3. [Log metrics inside your training loop](#log-metrics-inside-your-training-loop)
4. [Log an artifact to W\&B](/models/track/create-an-experiment#log-an-artifact-to-w%26b)
### Initialize a W\&B run
Use [`wandb.init()`](/models/ref/python/functions/init) to create a W\&B Run.
The following snippet creates a run in a W\&B project named `“cat-classification”` with the description `“My first experiment”` to help identify this run. Tags `“baseline”` and `“paper1”` are included to remind us that this run is a baseline experiment intended for a future paper publication.
```python theme={null}
import wandb
with wandb.init(
project="cat-classification",
notes="My first experiment",
tags=["baseline", "paper1"],
) as run:
...
```
`wandb.init()` returns a [Run](/models/ref/python/experiments/run) object.
Note: Runs are added to pre-existing projects if that project already exists when you call `wandb.init()`. For example, if you already have a project called `“cat-classification”`, that project will continue to exist and not be deleted. Instead, a new run is added to that project.
### Capture a dictionary of hyperparameters
Save a dictionary of hyperparameters such as learning rate or model type. The model settings you capture in config are useful later to organize and query your results.
```python theme={null}
with wandb.init(
...,
config={"epochs": 100, "learning_rate": 0.001, "batch_size": 128},
) as run:
...
```
For more information on how to configure an experiment, see [Configure Experiments](./config).
### Log metrics inside your training loop
Call [`run.log()`](/models/ref/python/experiments/run/#method-runlog) to log metrics about each training step such as accuracy and loss.
```python theme={null}
model, dataloader = get_model(), get_data()
for epoch in range(run.config["epochs"]):
for batch in dataloader:
loss, accuracy = model.training_step()
run.log({"accuracy": accuracy, "loss": loss})
```
For more information on different data types you can log with W\&B, see [Log objects and media](/models/track/log/).
### Log an artifact to W\&B
Optionally log a W\&B Artifact. Artifacts make it easy to version datasets and models.
```python theme={null}
# You can save any file or even a directory. In this example, we pretend
# the model has a save() method that outputs an ONNX file.
model.save("path_to_model.onnx")
run.log_artifact("path_to_model.onnx", name="trained-model", type="model")
```
Learn more about [Artifacts](/models/artifacts/) or about versioning models in [Registry](/models/registry/).
### Putting it all together
The full script with the preceding code snippets is found below:
```python theme={null}
import wandb
with wandb.init(
project="cat-classification",
notes="",
tags=["baseline", "paper1"],
# Record the run's hyperparameters.
config={"epochs": 100, "learning_rate": 0.001, "batch_size": 128},
) as run:
# Set up model and data.
model, dataloader = get_model(), get_data()
# Run your training while logging metrics to visualize model performance.
for epoch in range(run.config["epochs"]):
for batch in dataloader:
loss, accuracy = model.training_step()
run.log({"accuracy": accuracy, "loss": loss})
# Upload the trained model as an artifact.
model.save("path_to_model.onnx")
run.log_artifact("path_to_model.onnx", name="trained-model", type="model")
```
## Next steps: Visualize your experiment
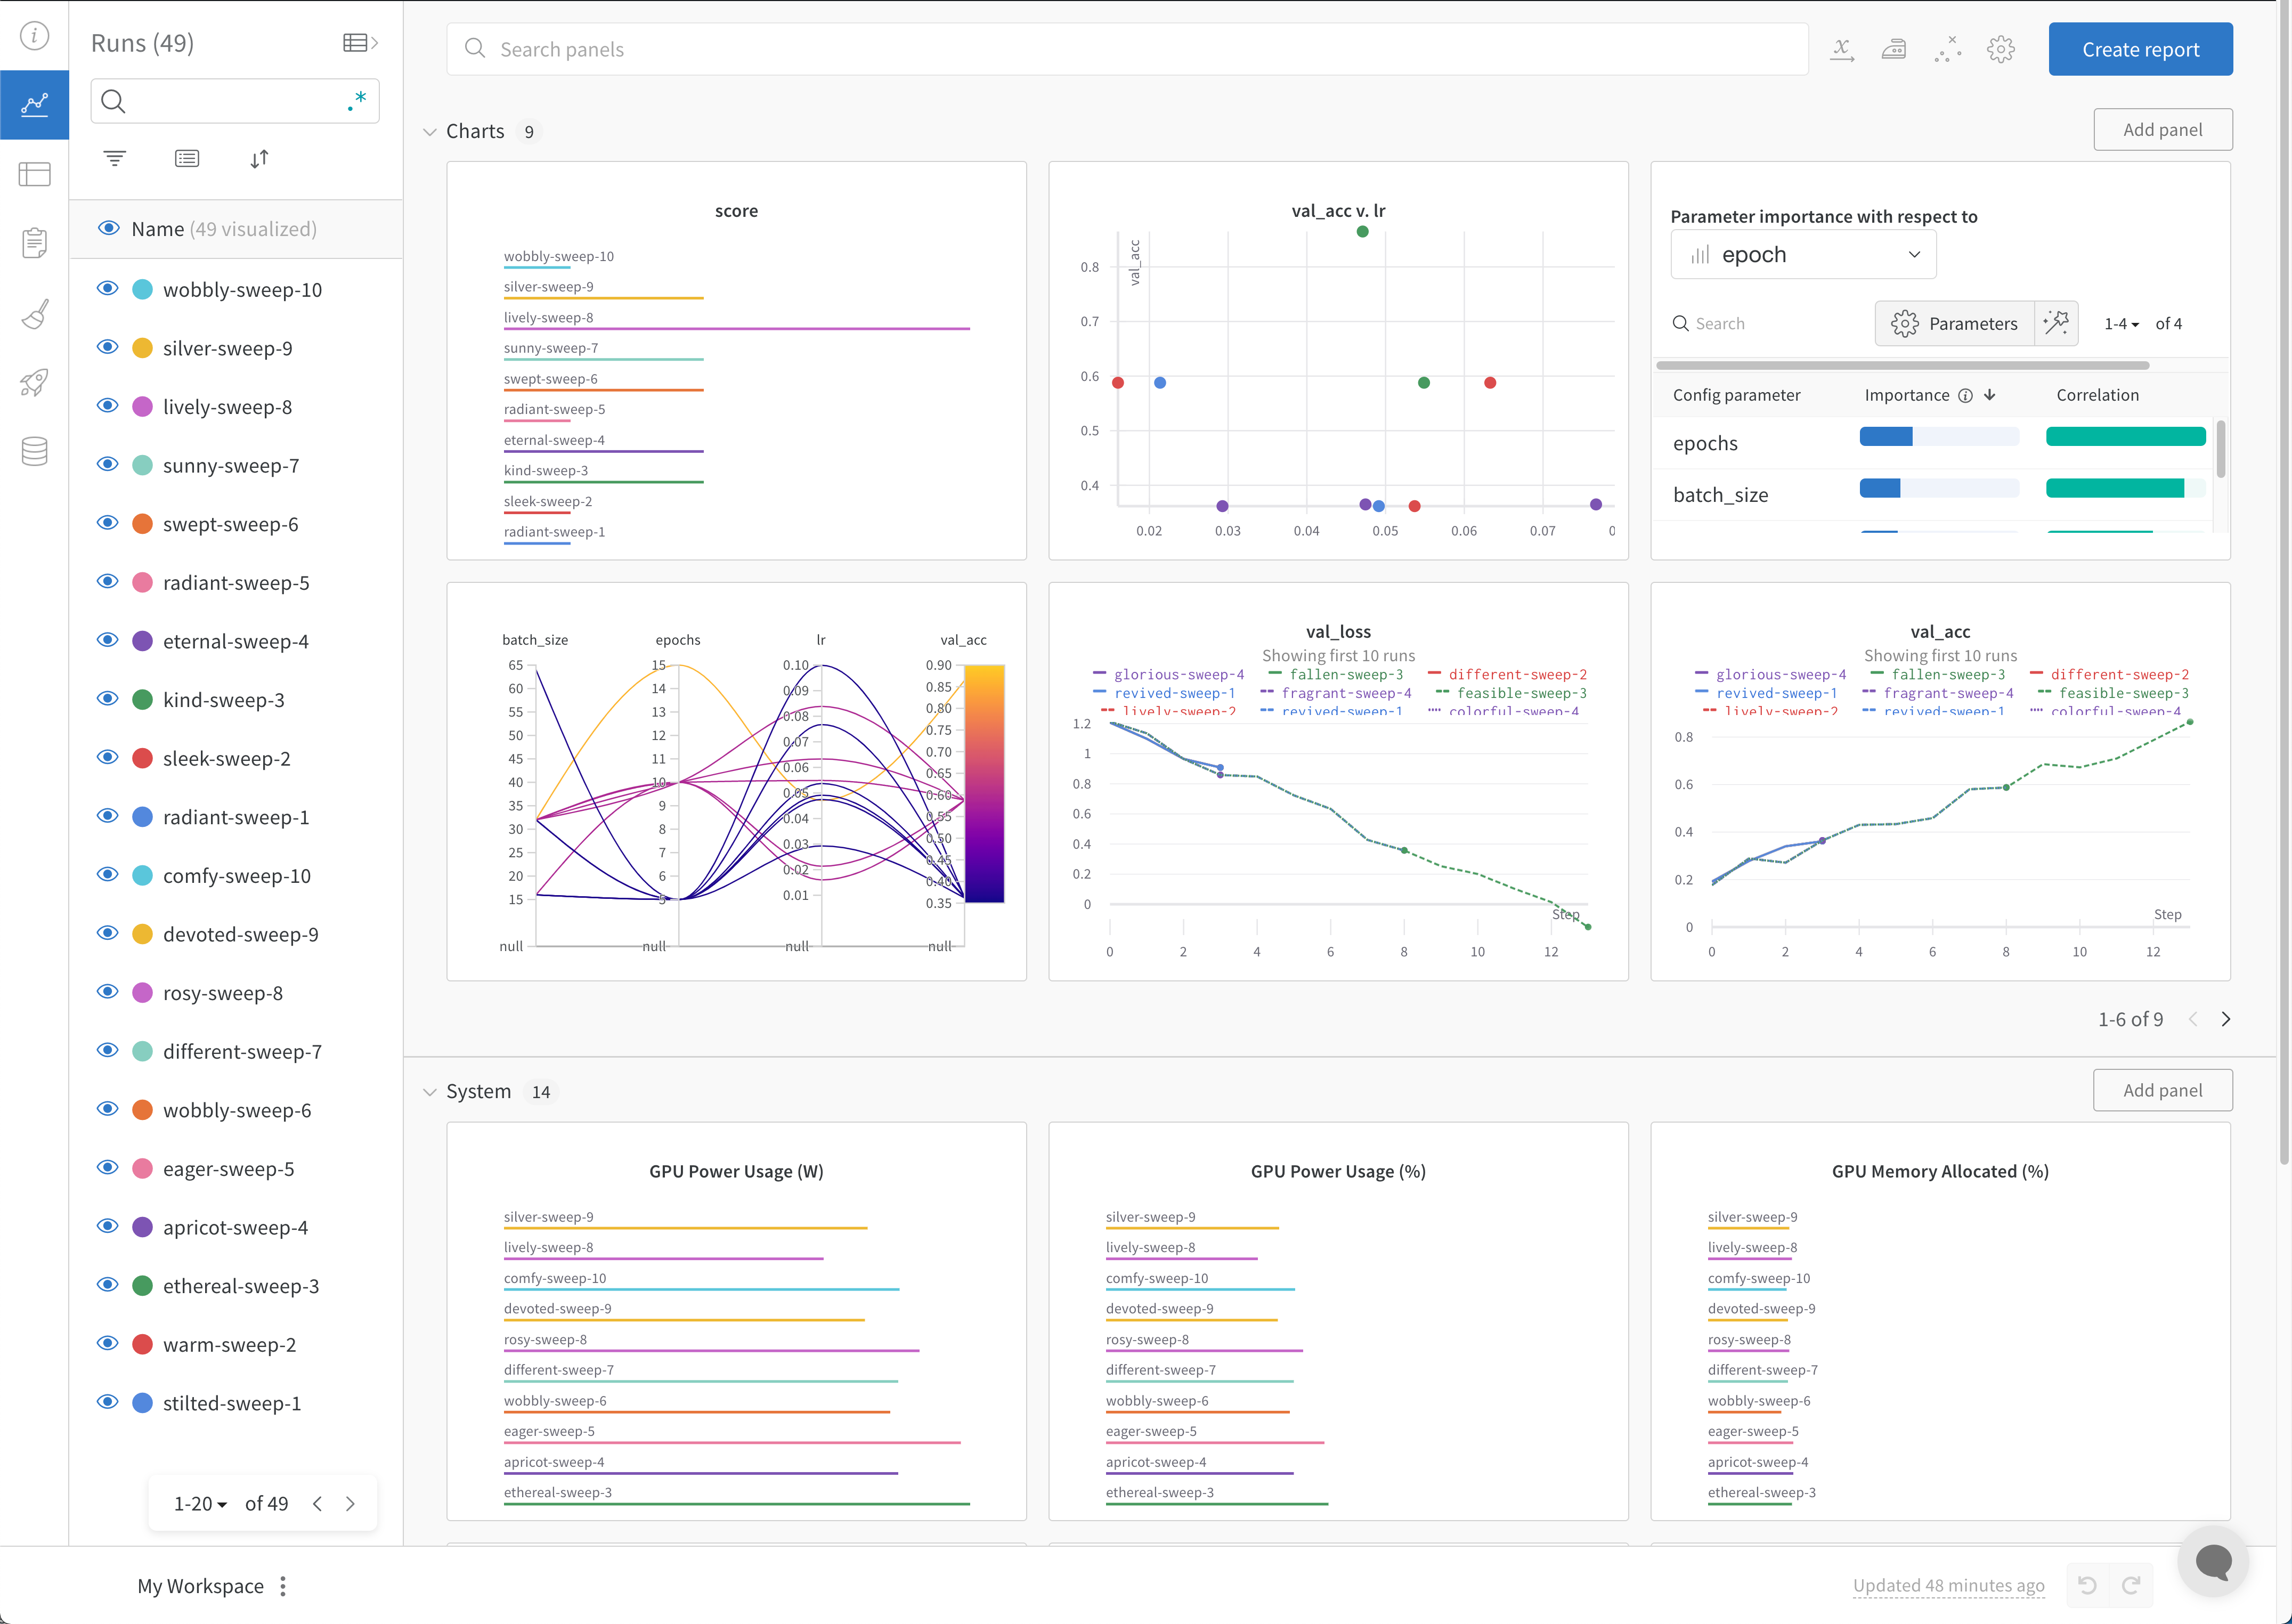
Use your project's workspace to organize and visualize results from your machine learning models. You can construct interactive charts like [parallel coordinates plots](/models/app/features/panels/parallel-coordinates/), [parameter importance analyses](/models/app/features/panels/parameter-importance/), and [additional chart types](/models/app/features/panels/).
 For more information on how to view experiments and specific runs, see [View experiment results](/models/track/workspaces/).
## Best practices
The following are some suggested guidelines to consider when you create experiments:
* **Manage runs with a context manager**: Use `wandb.init()` in a `with` statement to automatically finish the run when the code completes or raises an exception.
* In Jupyter notebooks, you might prefer to manage the run object yourself. In this case, call `finish()` to mark it complete:
```python theme={null}
# In a notebook cell:
run = wandb.init()
# In a different cell:
run.finish()
```
* **Config**: Track hyperparameters, model architecture, dataset information, and other values needed to reproduce your model. For more information, see [View the config in the Overview section of a run in the W\&B App](/models/track/config#view-config-values-in-the-w\&b-app).
* **Project**: Use [projects](/models/track/project-page) to organize experiments in a central location where you can visualize results, compare runs, view and download artifacts, create automations, and more.
* **Notes**: Add notes to describe the purpose of a run, such as `baseline model` or `tuned hyperparameters`. You can edit notes later from the run overview in the W\&B App.
* **Job types**: [Add job types to your runs](/models/runs/grouping#organize-runs-by-job-type) to organize and filter runs by task, such as `train`, `test`, or `inference`.
* **Tags**: [Add tags to runs](/models/runs/tags) to label runs with features or attributes that might not be obvious from logged metrics or artifacts.
The following example shows how to initialize a W\&B run using these best practices:
```python theme={null}
import wandb
config = {
"learning_rate": 0.01,
"momentum": 0.2,
"architecture": "CNN",
"dataset_id": "cats-0192",
}
with wandb.init(
project="detect-cats",
notes="tweak baseline",
tags=["baseline", "paper1"],
config=config,
) as run:
...
```
For more information about available parameters, see [`wandb.init()`](/models/ref/python/functions/init) in the [Python SDK Reference Guide](/models/ref/python/).
For more information on how to view experiments and specific runs, see [View experiment results](/models/track/workspaces/).
## Best practices
The following are some suggested guidelines to consider when you create experiments:
* **Manage runs with a context manager**: Use `wandb.init()` in a `with` statement to automatically finish the run when the code completes or raises an exception.
* In Jupyter notebooks, you might prefer to manage the run object yourself. In this case, call `finish()` to mark it complete:
```python theme={null}
# In a notebook cell:
run = wandb.init()
# In a different cell:
run.finish()
```
* **Config**: Track hyperparameters, model architecture, dataset information, and other values needed to reproduce your model. For more information, see [View the config in the Overview section of a run in the W\&B App](/models/track/config#view-config-values-in-the-w\&b-app).
* **Project**: Use [projects](/models/track/project-page) to organize experiments in a central location where you can visualize results, compare runs, view and download artifacts, create automations, and more.
* **Notes**: Add notes to describe the purpose of a run, such as `baseline model` or `tuned hyperparameters`. You can edit notes later from the run overview in the W\&B App.
* **Job types**: [Add job types to your runs](/models/runs/grouping#organize-runs-by-job-type) to organize and filter runs by task, such as `train`, `test`, or `inference`.
* **Tags**: [Add tags to runs](/models/runs/tags) to label runs with features or attributes that might not be obvious from logged metrics or artifacts.
The following example shows how to initialize a W\&B run using these best practices:
```python theme={null}
import wandb
config = {
"learning_rate": 0.01,
"momentum": 0.2,
"architecture": "CNN",
"dataset_id": "cats-0192",
}
with wandb.init(
project="detect-cats",
notes="tweak baseline",
tags=["baseline", "paper1"],
config=config,
) as run:
...
```
For more information about available parameters, see [`wandb.init()`](/models/ref/python/functions/init) in the [Python SDK Reference Guide](/models/ref/python/).